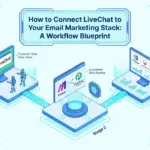

Skip the reading. Deploy this exact architecture and consolidate your B2B tech stack today.
Most no-code app builders promise to simplify your stack, but the reality is that converting an in-app user into a nurtured CRM lead still requires deliberate architecture across multiple platforms. If you have ever watched a promising lead slip through the cracks because your app, your form tool, and your CRM were never properly connected, this tutorial is built for you.
This post walks you through a complete, production-ready workflow called the App-Preneur Funnel. The chain runs from Adalo as your front-end app, through Jotform for structured in-app data collection, into Pabbly Connect as the automation backbone, and finally into HighLevel for CRM management, GlockApps for email deliverability monitoring, and Moosend for onboarding email sequences.
You will cover every layer: funnel architecture, platform prerequisites, step-by-step configuration for each stage, cross-platform data mapping, failure recovery procedures, GDPR considerations for multi-vendor environments, and scaling strategies. No documented benchmarks exist for this exact workflow chain, so every configuration detail presented here is based on first-principles technical reasoning. By the end, you will have a fully operational funnel you can deploy and adapt immediately.
What Is the App-Preneur Funnel and Why It Works
The App-Preneur is a solo founder or small-team operator who has built, or is actively building, a no-code app and needs a scalable lead capture and onboarding system without hiring a development team. This persona understands their product but typically manages marketing operations solo, making every dropped lead or delayed follow-up a direct revenue cost.
Fragmented point solutions consistently fail this persona. When your app, form tool, CRM, and email platform operate as disconnected islands, data silos form at every handoff. Manual exports create lag. Follow-up windows close before contacts receive a single onboarding message. Early-stage user retention collapses not because the product is weak, but because the operational infrastructure underneath it has gaps. If you have experienced this pattern firsthand, the marketing automation platform comparison guide for B2B funnel stages provides useful context on matching platform capability to your current acquisition maturity before committing to a stack.
This blueprint solves that fragmentation with a six-tool architecture designed as a single continuous funnel: Adalo handles the app layer, Jotform captures structured user data, Pabbly Connect routes and transforms the automation, HighLevel manages the CRM and pipeline, GlockApps monitors email deliverability, and Moosend executes the onboarding sequence.
The 2026 no-code market, projected to approach $50 billion by 2028, has matured enough to support complex, multi-stage workflows without writing code. Architecture decisions still carry weight, though; tool selection, field naming conventions, and failure recovery logic determine whether your funnel scales or silently drops contacts.
This guide delivers what most tutorials omit: precise data mapping schemas, documented failure recovery patterns, and email health integration built directly into the workflow architecture.

The Full Funnel Architecture at a Glance
Before building a single screen in Adalo, understand the data contract the entire funnel runs on.
The data flow, in sequence:
- A user interacts with your Adalo app and reaches the embedded feedback screen
- The screen renders a Jotform form; the user submits it
- That submission fires a webhook payload to Pabbly Connect
- Pabbly transforms and routes the contact data into HighLevel CRM, simultaneously triggering Moosend onboarding
- GlockApps monitors outbound email health continuously, running parallel to the sequence
Why each tool sits where it does: Pabbly Connect occupies the middle position because direct API calls from Jotform to HighLevel lack transformation logic, retry handling, and audit trails. Removing Pabbly strips out the layer responsible for field normalization, parallel routing, and failure logging. For a deeper comparison, see this Adalo-to-HighLevel sync workflow blueprint via Pabbly Connect.
Data objects in transit: Jotform captures name, email, feedback payload, and UTM source tags. Pabbly normalizes and maps those fields. HighLevel consumes them as contact properties and assigns a pipeline stage. Moosend receives name and email as personalization tokens. GlockApps operates at the sending domain level, scoring deliverability independently of individual contact records.
The trigger architecture is load-bearing. The Jotform submission is the single source-of-truth event for every downstream action. Field names set in Jotform become the variable references Pabbly reads; those same references populate HighLevel fields and Moosend tokens. A renamed field at Stage 2 silently breaks every stage after it.
Setup expectations: Plan for three to four hours of initial configuration across all six accounts. The single dependency that can halt the entire chain is a missing or incorrectly pasted Pabbly Connect webhook URL in Jotform’s settings. Without it, submissions fire and disappear with no error surfaced anywhere in the workflow.
Prerequisites: Accounts, Permissions, and What to Prepare Before You Build
Before opening any builder or automation canvas, provision all six accounts and complete the preparation tasks below. Skipping this step forces mid-build interruptions that corrupt partially configured workflows.
Required accounts, create these first:
- Adalo, Starter plan or above (required for external collections and WebView components)
- Jotform, Bronze plan minimum (webhook integrations are disabled on the free tier)
- Pabbly Connect, Standard plan or above; webhook-based triggers and multi-path routing require a paid subscription
- HighLevel, Starter plan activates contact automation rules and pipeline management, both required here
- GlockApps, Any paid tier; free accounts cap inbox placement tests too tightly for ongoing monitoring
- Moosend, Pro plan unlocks automation workflows and API access needed for Pabbly routing
Data preparation tasks to complete before Stage 1:
- Draft your Jotform field schema in a spreadsheet. Field names must match HighLevel custom field slugs exactly, including case and underscore formatting. The lead routing workflow connecting Jotform, Pabbly Connect, and HighLevel provides a reusable field mapping reference.
- Define your HighLevel pipeline stage names before building. Renaming stages after automation rules are attached breaks trigger conditions silently.
- Finalize your Moosend onboarding email sequence before activating Stage 6. Building automation around draft content wastes configuration time.
DNS and domain verification (critical for Stage 5): GlockApps requires a verified sending domain with SPF, DKIM, and DMARC records published in DNS before you connect it to a monitoring project. Testing an unverified domain produces placement data reflecting authentication failures, not actual content deliverability, making the baseline unreliable.
HighLevel sandbox setup: Create one test contact record and one sandbox pipeline in HighLevel now. Run all automation validation against these before routing live traffic. This keeps production CRM data clean throughout the build.
Stage 1: Building Your Lead-Capture App in Adalo
With your accounts provisioned and field schema drafted, you’re ready to build the Adalo screen that anchors the funnel.
Create a dedicated lead-capture screen rather than embedding a form on a multipurpose screen. A single-purpose screen eliminates competing UI elements that suppress completion. Set the background to a neutral color, remove the bottom navigation bar for this screen only, and limit header text to two lines so the WebView component holding the Jotform iframe occupies maximum vertical space without requiring a scroll before the first field.
Surface user properties before the form loads. Adalo’s database collections store email, user ID, subscription tier, and any app activity properties you have defined. Add invisible Text components bound to these fields using Adalo’s dynamic text binding. Their purpose is to make values available on-screen so they can be referenced in URL parameter expressions passed to the WebView.
Configure the WebView URL to include pre-fill parameters. Build the Jotform embed URL dynamically by appending query parameters using Adalo’s Magic Text inputs. For example: https://form.jotform.com/YOUR_FORM_ID?email= followed by the bound user email field. This is the identity bridge between your Adalo app and the downstream CRM record in HighLevel, ensuring every submission is traceable to a specific user without requiring re-entry.
Test across breakpoints in Preview mode before publishing. Jotform iframes clip or collapse when WebView height is fixed at a pixel value on narrower breakpoints; set height to fill the available container and confirm full form accessibility on both mobile and web targets.
Teams building from scratch can use Adalo’s AI-powered app generation feature, introduced in 2025, to scaffold the initial screen structure and authentication flow. For a broader view of how Adalo fits within CRM and funnel builder architectures, the B2B Tech Stacker directory provides comparative context across the no-code stack category.
Stage 2: Embedding and Configuring Jotform Inside Your Adalo App
With your Adalo lead-capture screen built and the form-trigger screen configured, the next step is replacing Adalo’s native form components with Jotform as the dedicated data capture layer.
Why Jotform Instead of Adalo’s Native Forms
Adalo’s native form components do not emit a standalone webhook event on submission. Triggering Pabbly Connect from a native Adalo form requires additional middleware to poll or intercept the database write. Jotform solves this cleanly: every submission fires a direct webhook payload to any endpoint you specify, with no intermediary. You also gain conditional logic and server-side field validation that Adalo cannot replicate natively.
Building the Field Schema
Create a new Jotform and name each field to mirror HighLevel’s contact property slugs exactly: first_name, last_name, email, phone. This eliminates manual remapping inside Pabbly Connect. If you plan to capture feedback categories, add a dropdown named feedback_type now; renaming fields after the Pabbly workflow is built causes silent variable-reference failures, covered in this LiveChat-to-email-marketing workflow blueprint.
Embedding via WebView and Pre-Populating Email
In Adalo’s WebView component, update the URL to include the pre-fill parameter added in Stage 1 and confirm the 600px minimum height is set.
Configuring the Webhook
Inside Jotform, navigate to Settings → Integrations → Webhooks. Paste your Pabbly Connect webhook URL (generated in Stage 3) and enable Send on Submit. The payload fires synchronously on submission, which matters for time-sensitive CRM record creation.
Validation and Spam Prevention
Mark first_name, email, and phone as required fields. Enable Jotform’s CAPTCHA or honeypot filter under Settings → Form Settings. Incomplete payloads passed to Pabbly Connect can cause silent CRM record failures; form-level validation stops that before it starts.
Stage 3: Wiring the Automation Hub with Pabbly Connect
With your Jotform webhook configured, Pabbly Connect is the destination. It is the critical node in this stack: every submission Jotform fires passes through Pabbly Connect before anything reaches your CRM or email platform.
Create the Trigger Workflow
Inside Pabbly Connect, click Create Workflow, name it (e.g., “Adalo Funnel”), then add a trigger step. Select Jotform as the trigger app and New Response as the trigger event. Pabbly generates a unique webhook URL. Copy it and paste it into Jotform’s webhook settings as covered in Stage 2. Submit a test entry to send a live payload into Pabbly and capture the field schema.
Transform the Data Before It Moves
Add a Text Formatter action step after the trigger. Use it to capitalize first_name and last_name, strip non-numeric characters from phone, and assign a static default value (e.g., App Subscriber) to the pipeline stage variable. These transformations block dirty data from reaching HighLevel at the source rather than requiring cleanup later.
Split the Workflow with a Router
Check your Pabbly Connect plan’s Router feature availability before building parallel paths; the step described here assumes Router is available on your subscription tier. Add a Router step next. Configure two parallel paths: Path A maps the cleaned payload to HighLevel; Path B sends subscriber data to Moosend. Parallel routing fires both actions simultaneously, eliminating the sequential delay of one action waiting on the other. This pattern is covered in the HighLevel and Pabbly Connect workflow blueprint for multi-destination automation.
Configure Error Handling
Enable Task History in your workflow settings. For each Router path, activate the re-run rule so a failed task caused by an API timeout retries automatically rather than dropping silently. After every test submission, verify that both Path A and Path B show a success status before sending live traffic through the funnel.
Stage 4: Receiving and Managing Leads in HighLevel
With Pabbly Connect’s Path A pointed at HighLevel, the CRM configuration determines whether that payload lands cleanly or fails silently.
API key scoping is the first gating step. In HighLevel, navigate to Settings → API Keys and confirm the active key has read/write permissions scoped to both Contacts and Pipelines. A key missing Pipeline scope may create the contact but fail to assign a pipeline stage; monitor Pabbly’s task log and HighLevel’s pipeline view to catch this. Map each incoming Pabbly field to its exact HighLevel contact property. Verify the phone number output from Stage 3’s Text Formatter matches HighLevel’s required input format before connecting the path.
Build a dedicated pipeline for this funnel. Create four stages mirroring the user journey: App Subscriber, Feedback Submitted, Onboarding Active, and Converted. Contacts enter at App Subscriber when Pabbly fires, then advance as downstream events (Jotform submission, Moosend email engagement) trigger stage updates. This keeps App-Preneur funnel data separate from other acquisition channels. For how Pabbly Connect handles similar multi-path routing, see this affiliate commission workflow blueprint using Pabbly Connect.
Set up an automation trigger for internal notifications. In HighLevel’s Workflows, trigger on “Contact Added to Pipeline Stage: App Subscriber” and attach an SMS or email action to the founder or team. High-intent responses warrant follow-up within minutes.
Enable duplicate prevention before live traffic hits. Activate “Merge Duplicate Contacts” with email as the primary deduplication key. Without it, a duplicate Jotform submission splits one user’s history across two contact records.
Apply a source tag to every contact from this workflow. Assign the tag adalo-funnel-2026 on contact creation. This tag filters Smart Lists, scopes reports, and targets automation lists to this channel exclusively.
Stage 5: Monitoring Email Deliverability with GlockApps
With your HighLevel pipeline now receiving and tagging inbound contacts, the next failure point is invisible by design: your Moosend onboarding emails reaching spam folders instead of inboxes. Neither HighLevel nor Moosend surfaces proactive deliverability alerts, so domain reputation degradation silently kills onboarding sequences while your CRM shows a healthy contact count.
GlockApps closes that blind spot. Start by creating a new project, connecting your verified sending domain, and running an initial inbox placement test. GlockApps sends seed messages to real mailboxes across major providers and reports back the percentage landing in the inbox versus spam or missing entirely. Record that number as your deliverability baseline before activating a single Moosend sequence. Your SPF, DKIM, and DMARC records must be confirmed before this test produces reliable data; Gmail enforces authentication for all senders and flags unauthenticated messages at the domain level.
Before the sequence goes live, run GlockApps’ spam filter checker against your Moosend email templates. The tool flags specific words, link patterns, and formatting choices that trigger filters. Fix those issues pre-launch. A spam complaint rate above 0.3% can damage your sending domain at the infrastructure level, making post-launch remediation significantly harder than pre-launch copy edits.
Configure GlockApps monitoring alerts at a threshold appropriate for your sending volume; a drop from your recorded baseline is the actionable trigger, not a universal percentage.
For ongoing cadence: run an inbox placement test after any Moosend template edit, after a sending volume spike, and on a fixed monthly schedule. Deliverability responds dynamically to content changes, list hygiene, and sending behavior. For broader context on email marketing deliverability practices, the B2B Tech Stacker resource library covers this as a dedicated category.
Stage 6: Activating the Onboarding Email Sequence in Moosend
With your GlockApps deliverability baseline confirmed, Moosend becomes the execution layer that converts a validated CRM record into a structured onboarding experience.
Connecting Moosend via Pabbly Connect Path B
In Pabbly Connect, target Moosend in Path B using the native integration or API action with your Moosend API key. Set the action to Add Subscriber, explicitly select your onboarding list by its list ID, and map the email, first name, and feedback category as fields.
The Four-Email Onboarding Sequence
- Email 1 (Immediate): Welcome message confirming app value and next step
- Email 2 (Day 2): Feature spotlight tied to the feedback category submitted in Jotform
- Email 3 (Day 5): Social proof or use-case story relevant to that feedback category
- Email 4 (Day 10): Conversion offer or upgrade CTA aligned to the contact’s HighLevel pipeline stage
Automation Branching in the Workflow Builder
After Email 1, add a condition: if the contact opens but does not click, trigger a re-engagement variant at Day 3. If the contact clicks the Email 3 CTA, update a custom field (for example, cta_clicked = true). Pabbly Connect can poll or receive a webhook from Moosend on that change to push a pipeline update in HighLevel.
Personalization Tokens
Use [first_name], [feedback_category], and any app activity field passed from Jotform through Pabbly. Subject lines reflecting a user’s own submitted feedback topic are more contextually relevant than generic welcome copy.
List Hygiene and Deliverability Feedback Loop
Configure Moosend to suppress hard bounces and process unsubscribes immediately. This directly protects the GlockApps inbox placement scores established in Stage 5. Invalid addresses degrade your sending domain’s reputation, which GlockApps will flag. Treat Moosend list hygiene and GlockApps monitoring as one continuous feedback loop, not two separate responsibilities.
Data Mapping Reference: Field Schema Across the Entire Stack
With your Moosend personalization tokens configured, ensuring field name consistency across every tool is critical. Field schema mismatches are the leading cause of silent failures in multi-tool funnels: no error fires, the workflow appears to complete, but contact records land in HighLevel with blank custom fields and Moosend emails render with empty personalization slots.
Use this reference table as your build standard:
| Jotform Field Name | Pabbly Connect Variable | HighLevel Contact Property | Moosend Token |
|---|---|---|---|
| first_name | first_name | first_name | {First Name} |
| {Email} | |||
| phone | phone | phone | {Phone} |
| feedback_category | feedback_category | feedback_category | {Feedback Category} |
| app_tier | app_tier | app_tier | {App Tier} |
Naming convention rules that prevent silent failures:
- Treat Pabbly Connect variable names as case-sensitive and space-sensitive to be safe; use
first_nameconsistently rather than mixing cases across tools. - Use lowercase snake_case for all HighLevel custom field slugs; inconsistent casing is a frequent source of mapping failures.
- Moosend personalization tokens must match the exact column header in your subscriber list;
{Feedback Category}fails silently if your list column readsfeedback_category
Handling null values from optional fields: When a user skips a non-required Jotform field, Pabbly receives a null. Add a Set Value step in Pabbly immediately after the trigger, replacing any null with not provided. This prevents HighLevel and Moosend from interpreting a missing value as a record format error.
Pre-launch schema test protocol:
- Submit a test entry through Jotform using known values for every field
- Open Pabbly Connect’s task log and confirm each variable resolved correctly
- Check the HighLevel contact record to verify all custom fields are populated
- Open the Moosend subscriber entry and confirm personalization tokens display correctly
Maintain a living field schema document. A simple spreadsheet with five columns (Jotform field, Pabbly variable, HighLevel property, Moosend token, data type) takes 20 minutes to build and saves hours when you rename a Jotform field, add a HighLevel custom property, or onboard a team member debugging a broken automation step.

Failure Recovery: What Breaks, Why, and How to Fix It
Even a perfectly mapped field schema won’t protect you if the plumbing between tools silently breaks. These are the four failure points that cause the most undetected lead loss in this stack.
1. Jotform webhook misconfiguration. The webhook URL was entered incorrectly in Jotform’s Settings → Integrations → Webhooks panel, or your Pabbly Connect subscription lapsed and deactivated the endpoint. Jotform fires the submission successfully and shows no error; Pabbly simply never receives it.
2. Pabbly Connect field mapping drift. A Jotform field was renamed after the Pabbly workflow was built. The variable reference now points to a label that no longer exists, passing a blank value downstream with no error logged.
3. HighLevel API rate limiting. A submission burst exceeds HighLevel’s API call rate. Some contact creation requests fail, but Pabbly’s task log may still show the task as successful because the API accepted the request before the rate limit response returned.
4. Moosend list mismatch. The Pabbly-to-Moosend action targets a list ID that was deleted or renamed. The contact lands in HighLevel but never enters the onboarding sequence.
Diagnostic Protocol
Open Pabbly Connect’s task history first. It logs both the inbound Jotform payload and outbound API calls to HighLevel and Moosend, making it the single most useful debugging surface in the chain. Cross-reference the raw received payload against mapped output values to isolate which variable broke and at which step.
Canary Submission Practice
Once per week, submit a test entry through the live Jotform form, not the preview. Confirm the HighLevel contact record was created with all expected fields and that Moosend added the subscriber to the correct list. This five-minute check catches mapping drift, expired credentials, and list ID changes before they affect real users.
Cascading Failure Fallback
Jotform webhook submissions may not retry automatically during downstream downtime; configure Jotform’s built-in email notification as a fallback so every submission is delivered to a team inbox, giving you a recovery dataset to re-process once Pabbly Connect comes back online.
Task Usage Threshold
As monthly task consumption approaches your plan limit, Pabbly may delay or queue workflows; monitor task usage and upgrade before hitting the ceiling to avoid onboarding delays.
GDPR and Data Privacy Considerations for a Multi-Vendor Stack
Beyond technical failures, this funnel carries a second category of operational risk: regulatory exposure created by distributing personal contact data across six independent vendors.
Data residency is not a single-vendor problem here. Adalo, Jotform, Pabbly Connect, HighLevel, GlockApps, and Moosend each store and process contact data independently on their own infrastructure. GDPR compliance requires a signed Data Processing Agreement with each vendor acting as a processor and a review of each vendor’s data-residency and transfer safeguards.
Consent is captured at the Jotform layer, and that placement carries legal weight. The opt-in checkbox must include explicit language naming email marketing as the purpose, presented separately from other form content in plain language. Configure Jotform to capture the submission timestamp and IP address as dedicated hidden fields so that HighLevel stores verifiable proof of consent directly alongside the contact record.
Right-to-erasure requests require manual action across multiple systems. Article 17 right-to-erasure requests require deletion from every system holding that contact’s personal data; in this stack that includes HighLevel, Moosend, and Jotform. Document a written deletion SOP and assign a named owner to every incoming request; no automated cross-platform deletion exists in this stack.
The webhook payload is a privacy consideration. Review Pabbly Connect’s encryption-in-transit policies to confirm that webhook payloads containing personal data are transmitted over TLS before processing data for EU residents. Pabbly’s task history logs retain the full submission payload and are visible to every user with account access, so review Pabbly Connect’s encryption-at-rest and log-retention policies as well.
Add a gdpr-consent-verified tag in HighLevel to every contact created through this funnel. Scope all marketing automation rules in HighLevel to filter on that tag, preventing accidental sends to contacts whose consent status is unconfirmed or missing.
How to Scale This Funnel as Your App Grows
With compliance architecture in place, the next priority is ensuring the funnel performs reliably as user volume compounds.
Volume bottlenecks appear in a predictable sequence. Pabbly Connect task limits are the first constraint you will hit; each form submission consumes at least one task, and routed workflows consume additional tasks per path. Monitor monthly task consumption against your plan ceiling. Jotform submission limits on lower-tier plans become the second pressure point as daily active users grow. Upgrade Jotform before submission caps cause silent form failures. For teams managing multiple apps or client funnels, HighLevel’s sub-account structure isolates each funnel under one agency account without cross-contaminating pipeline data.
Segmentation depth scales without rebuilding. Use Jotform’s conditional logic to branch submissions by user type (free vs. paid, feature-A vs. feature-B) before the webhook fires. Each branch targets a separate Pabbly Connect path, which assigns a distinct HighLevel pipeline stage and triggers a different Moosend onboarding sequence. One form, multiple nurture tracks.
Adalo performance degrades on lower-tier plans when high-frequency WebView renders and external collection API calls stack up. Review plan limits for API call volume before traffic scales, since in-app form trigger latency directly affects user experience.
HighLevel’s reporting dashboard transitions from a convenience to a necessity at pipeline scale; use it to measure per-stage conversion rates, locate drop-off points, and calculate Moosend sequence ROI against closed pipeline revenue.
Run a quarterly stack audit treating all four signals as one connected health dashboard: Pabbly Connect error rate trends, GlockApps deliverability scores, Moosend open and click benchmarks, and HighLevel pipeline velocity. Degradation in any single signal almost always correlates with movement in another.
Your App-Preneur Funnel Is Ready to Run
With your quarterly stack audit rhythm established, you have the operational cadence to keep this funnel healthy long-term. The architecture itself is the foundation everything else rests on, with each layer upgradeable independently as your app grows.
Three actions to take before anything else:
- Finalize the Jotform field schema first. Field names are load-bearing decisions that propagate downstream into Pabbly, HighLevel, and Moosend. Changing them after the workflow is built forces remapping at every stage.
- Run a GlockApps deliverability baseline before activating Moosend. A degraded sending domain poisons onboarding sequences before the first contact ever enrolls.
- Submit a canary test entry through the live Jotform and trace it through Pabbly Connect’s task log. Confirm HighLevel received the contact record and Moosend enrolled the subscriber before sending real traffic.
Once validated, the funnel operates without manual intervention. Every Jotform submission automatically profiles a contact in HighLevel, enrolls them in a Moosend sequence, and runs against a deliverability-monitored domain. Each tool’s documentation and trial options are linked throughout this guide.
This funnel architecture provides a structured approach to connecting app-layer engagement to CRM-layer revenue operations without writing a single line of code.
Conclusion
You have now built a fully connected, no-code funnel that takes a prospect from in-app touchpoint to CRM-managed pipeline without writing a single line of code. Field schema decisions made in Jotform ripple across every downstream tool; Pabbly Connect is the silent orchestrator that must be validated before live traffic arrives; deliverability health in GlockApps directly protects your Moosend sequences; and HighLevel is where lead intelligence finally becomes actionable revenue.
The architecture is modular: each layer can be upgraded independently as your app grows.
Build it once. Let it run. Then focus your energy on growing the audience that feeds it.