
Skip the reading. Deploy this exact architecture and consolidate your B2B tech stack today.
Every support conversation is a sales opportunity hiding in plain sight. When a prospect reaches out through LiveChat, they are already engaged, already curious, and already one step closer to converting. Yet most teams let that intent evaporate the moment the chat window closes, with no follow-up sequence, no CRM record, and no automated nurturing to carry the momentum forward.
This blueprint closes that gap. You will learn how to build a multi-destination automation architecture that captures LiveChat contact data and routes it intelligently into AWeber, Moosend, and HighLevel using either Make or Pabbly Connect as your middleware layer. The result is a fully automated support-to-sales engine that transforms reactive chat support into a proactive revenue channel.
The sections ahead cover everything from webhook configuration and middleware scenario building to duplicate prevention, consent management, error handling, and custom field mapping. Whether you are standardizing on one email platform or distributing contacts across multiple tools based on routing logic, this guide gives you the technical foundation to build it correctly, reliably, and at scale.
The Support-to-Sales Architecture: How the Data Flows
Every LiveChat conversation carries a qualified lead signal. The workflow documented in this blueprint captures that signal automatically, eliminating the manual CRM entry and copy-paste handoffs that typically break the support-to-marketing handoff.
The data flow follows a single linear path with one branch point:
- A chat event fires in LiveChat and emits a JSON webhook payload containing the visitor’s name, email, agent-applied tags, and chat metadata.
- That payload is received by either Make or Pabbly Connect as the automation middleware layer.
- The middleware parses the payload and routes the contact record to one or more destination email platforms: AWeber, Moosend, or HighLevel.
Two middleware options are covered because they serve different operational profiles. Make provides a visual canvas suited to complex conditional branching across multiple platforms. Pabbly Connect uses a flat-rate task pricing model that makes it more economical at high monthly chat volumes where per-task costs would otherwise compound quickly.
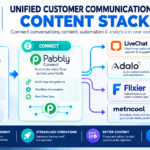
The three destination platforms have distinct, non-overlapping roles. AWeber handles scheduled broadcast sequences and linear follow-up cadences. Moosend executes behavioral automation, branching sequences based on open and click activity. HighLevel consolidates the contact record, pipeline stage, and email sequence in one environment, making it the correct destination for high-intent leads.
LiveChat exposes two trigger types relevant to this workflow. A post-chat survey submission fires only when the visitor completes the survey form, making it the preferred trigger when explicit marketing opt-in is captured at that step. An agent-tagged conversation close fires when the agent ends the chat and applies a qualifying tag; this is the appropriate trigger when opt-in consent is collected earlier in the pre-chat form and the agent’s tag serves as the routing signal rather than the consent mechanism.
Prerequisites: What You Need Before Building the Workflow
Before touching any middleware, confirm the following accounts and configurations are in place.
Required Accounts
- LiveChat: check your LiveChat account settings or plan documentation to confirm webhook availability, as this feature may be restricted on entry-level plans
- Middleware: either a Make workspace or a Pabbly Connect account
- Destination platform: at least one of AWeber, Moosend, or HighLevel with API access enabled in account settings
LiveChat Configuration Steps
Complete these inside LiveChat before generating any webhook URL:
- Navigate to Settings > Chat Survey and enable your post-chat survey with the email field set to required.
- Define a consistent agent tagging convention;
sales-prospectis a practical starting tag. Every agent must apply tags uniformly for routing logic to function. - Locate the webhook panel at Settings > Integrations > Webhooks. You will paste the middleware-generated URL here in Step 1.
Data Fields Passed Downstream
The LiveChat webhook payload delivers: visitor name, email address, chat transcript URL, agent tag array, session timestamp, and any pre-chat survey responses. These are the fields your middleware will parse and map.
Middleware Setup
In Make, open a blank scenario with no modules added. In Pabbly Connect, create a new workflow, name it (for example, LiveChat to Email Stack), and select Webhook as the trigger to generate the capture URL. Copy that URL before returning to LiveChat.
Consent and Compliance
Your survey must include explicit, affirmative opt-in language for marketing emails. GDPR requires consent to be freely given and unambiguous, and CAN-SPAM requires a clear opt-out mechanism per U.S. CAN-SPAM Act requirements. Neither law permits implied consent. Store the consent timestamp as a custom field in your destination platform from the start; retrofitting this later is significantly harder, as covered in the HighLevel-specific steps of this blueprint.
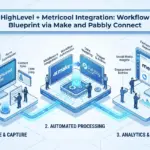
For reference on how authentication and field mapping carry across similar middleware architectures, the HighLevel and Metricool workflow blueprint using Make and Pabbly Connect demonstrates the same pattern of connecting CRM triggers to downstream platforms through structured data mapping.
With accounts active, LiveChat configured, and consent language in place, you are ready to build the webhook trigger in Step 1.
Step 1: Configure the LiveChat Webhook Trigger
With your accounts configured and tagging conventions documented, you’re ready to establish the trigger that starts every automation run.
1. Navigate to the webhook panel. In LiveChat, go to Settings > Integrations > Webhooks and click Create new webhook. Paste the inbound URL generated by Make or Pabbly Connect into the URL field.
2. Choose the correct event type. Select Chat ended if your routing strategy relies on agent tags as the filter; this event fires on every closed conversation. Select Post-chat survey submitted when you need explicit opt-in capture, since it fires only when a visitor completes the survey form. For most support-to-sales workflows, Chat ended paired with consistent agent tagging is the more reliable trigger.
3. Add a secret token. In the webhook’s Headers section, add a custom header such as X-LiveChat-Token with a strong alphanumeric value. In Make, validate it using the Header filter condition inside the webhook module. In Pabbly Connect, add a filter step after the trigger that terminates the run on a mismatch. This blocks unauthorized payload injections.
4. Understand the JSON payload. LiveChat’s webhook payload typically includes fields such as customer email, customer name, agent tags, and a session identifier, confirm exact field names against LiveChat’s current developer documentation. As illustrative examples, these may appear as:
customer_email– subscriber address for downstream enrollmentcustomer_name– first and last name for personalizationtags– array of agent-applied tags used as routing conditionschat_id– unique session identifier for deduplication
5. Troubleshoot webhook silence. Check your LiveChat account settings or plan documentation to confirm webhook availability, as this feature may be restricted on entry-level plans. Also confirm that the selected event type matches your test action. A Chat ended webhook will not fire if you only submitted the post-chat survey without closing the chat, and vice versa.
Step 2A: Build the Automation Scenario in Make
With your LiveChat webhook configured and firing, the next step is building the Make scenario that receives and routes that payload.
Scenario Initialization and Webhook Trigger
In Make, create a new scenario and add a Webhooks module as the first node. Select Custom webhook, then click Add to generate a unique inbound URL. Copy that URL and paste it into the LiveChat webhook URL field from Step 1. Send a test chat to trigger a live payload capture. Make will display the full JSON structure, which you must confirm before advancing.
Parsing the LiveChat Payload
Make auto-maps the captured payload fields. Locate the customer email, customer name, and tags array in the data structure panel. Because the tags field is an array, add what Make typically labels an Array iterator module immediately after the webhook trigger. This flattens each tag into a discrete bundle, making individual tag values available as simple string variables for the filter conditions downstream.
Router Configuration
Add what Make typically labels a Router module after the iterator. Create three separate route branches: one each for AWeber, Moosend, and HighLevel. On each branch, set a Filter condition using the tag value output from the iterator. For example, the AWeber branch filter reads: tag value equals newsletter-opt-in.
Adding the AWeber Action Module
On the AWeber route, add the AWeber app module and select Add Subscriber. Authenticate via OAuth when prompted. Choose your target list, then map the customer name and customer email fields from the LiveChat payload to the corresponding AWeber fields.
Error Handling
Right-click each action module and select Add error handler. Choose what Make typically labels a Break directive, which saves failed executions to Make’s incomplete executions queue for manual retry. Add a secondary Send an email or notification module on the error handler route to alert your team immediately when an enrollment fails, preventing silent data loss.
Step 2B: Build the Automation Workflow in Pabbly Connect
In Pabbly Connect, create a new workflow, click Create Workflow, and name it something descriptive like “LiveChat to Email Stack.” For the trigger app, select Webhook and copy the generated capture URL. Paste that URL into the LiveChat webhook field configured in Step 1, then send a test chat to fire a live payload.
Response Mapping
Pabbly captures the incoming payload automatically and maps every field from the JSON response, including customer email, name, and the tags array. Those mapped fields become selectable variables in every downstream action step, eliminating manual field declaration.
Router Branching by Tag
Add a Router step and create filter branches for each destination platform, the same logical structure used in Make applies here.
Pabbly-to-Moosend Action Step
On the Moosend branch, select the Moosend app, authenticate using your Moosend API key, choose the target subscriber list or segment, then map the email and name fields from the LiveChat payload to the corresponding Moosend subscriber fields.
Task Consumption Planning
Pabbly counts each action step execution as one task. For marketing automation and email stacks handling hundreds of daily chats, estimating monthly task volume before committing to a plan tier is essential.
Step 3: Configure AWeber for Support Chat Subscriber Intake
With your middleware routing live, AWeber receives the contact payload and begins the nurturing sequence. Configure it correctly from the start to keep support-originated leads cleanly separated from general marketing lists.
Create a dedicated list. In AWeber, create a new list named “LiveChat Prospects” rather than adding support contacts to an existing newsletter list. Separate list architecture preserves segmentation integrity and keeps customer experience and support metrics isolated for accurate reporting.
Configure the welcome message for support context. Edit the first follow-up message (Follow Up #1, delay 0 days) to open with support-specific language: “You recently chatted with our team about [topic]…” This framing outperforms a generic newsletter welcome because it references a real interaction the contact remembers.
Map custom fields. In AWeber’s list settings, create a custom field named “Chat Source” before your middleware sends the first contact. Then map fields as follows:
- LiveChat customer name to AWeber Name
- LiveChat email to AWeber Email
- LiveChat tag or transcript URL to AWeber Chat Source
Build the follow-up sequence. A three-email minimum covers the support-to-sales arc effectively:
- Email 1 (Day 0): Deliver a resource relevant to the chat topic
- Email 2 (Day 3): Soft product mention tied to the support issue
- Email 3 (Day 7): Direct CTA referencing the original inquiry
Set single opt-in. For contacts who submitted email via a pre-chat form containing explicit consent language, single opt-in is the correct configuration. If explicit consent was already captured at the pre-chat form, double opt-in may introduce unnecessary friction; consult your platform’s deliverability guidance and your own compliance requirements before choosing between single and double opt-in.
Step 4: Configure Moosend for Behavioral Email Automation
Mailing List and Trigger Setup
In Moosend, create a dedicated mailing list for LiveChat-sourced contacts, isolated from general campaign lists for clean reporting. Navigate to Automation, create a new recipe, and set the entry trigger to Subscriber joins list. This fires the moment your middleware adds a contact from the LiveChat payload.
Conditional Wait Logic
Add a Send Email step for the welcome message, then append a Wait step set to 48 hours. After the wait, insert a Condition branch checking whether the contact opened the welcome email. Route openers into a product-focused sequence; route non-openers into a re-engagement track with a different subject angle. This single branch improves relevance without manual list segmentation.
Custom Field: Chat Source Tag
In the mailing list settings, create a custom text field named Chat Source Tag. In your middleware (Make or Pabbly Connect), map the LiveChat agent tag value to this field during subscriber creation. Every contact now carries the product area or issue category from their original support conversation, enabling targeted email marketing automation that reflects actual conversation context.
Personalization and Suppression
Reference the Chat Source Tag as a merge tag in subject lines and body copy, for example: “Following up on your question about [Chat Source Tag].” Subject lines referencing a specific prior interaction are generally expected to improve relevance for the recipient, test this hypothesis against your own list performance data.
Before the recipe enrolls any contact, configure a suppression list check as the first conditional step. If the email matches a suppressed address, exit the automation immediately. This satisfies CAN-SPAM unsubscribe requirements per U.S. CAN-SPAM Act requirements and prevents re-enrollment of contacts who previously opted out of any Moosend campaign.
Step 5: Configure HighLevel for CRM-Integrated Nurturing
HighLevel operates across a wider surface than a standalone email platform: contact record, pipeline stage, email sequence, and SMS follow-up exist in a single environment, making it the correct destination for contacts tagged as high-intent during a support chat where a sales rep needs full context alongside the nurture sequence.
Contact Creation via Middleware
In your Make or Pabbly Connect action module, select the HighLevel “Create/Update Contact” action. Map the LiveChat payload fields as follows:
- First Name and Last Name from the parsed customer name field
- Email from the customer email field
- Pipeline Stage set to a static value such as “Support Lead”
- Tags mapped to the LiveChat agent tag value for downstream workflow filtering
Workflow Trigger Configuration
Inside HighLevel’s Automation builder, set the entry trigger to “Contact tag added equals [LiveChat tag value]”. Build a timed sequence: an initial email within 15 minutes, an internal task notification assigned to the sales team at 24 hours, and an optional SMS step for contacts carrying a high-priority tag such as “sales-qualified.”
Pipeline View for Conversion Tracking
Place all LiveChat-originated contacts in a dedicated pipeline. The sales team can then see which support conversations progressed to opportunities without manual tagging, creating a measurable support-to-pipeline conversion rate.
Duplicate Contact Handling
Enable the “Check if contact exists” logic in the middleware action step; see the Duplicate Contact Prevention section for the full deduplication pattern.
Routing Logic: Deciding Which Platform Gets Which Contact
With each platform now configured, the final architectural decision is which contact goes where and when.
Agent tags are the primary routing signal. Standardize three tags in LiveChat and document them in a shared team reference (a pinned spreadsheet or wiki page works):
newsletter-opt-inroutes to AWeberbehavioral-follow-uproutes to Moosendsales-qualifiedroutes to HighLevel
Consistent tagging across all agents is non-negotiable. One mislabeled tag breaks the routing condition entirely.
As established in the architecture overview, AWeber handles broadcast sequences, Moosend handles behavioral branching, and HighLevel manages CRM-integrated pipeline entry.
Multi-destination routing for high-value contacts. Contacts tagged sales-qualified should go to both HighLevel and Moosend simultaneously. In Make, configure two parallel Router branches that fire on the same tag condition. In Pabbly Connect, add two sequential action steps within the same branch. HighLevel handles CRM and pipeline entry; Moosend runs behavioral email automation in parallel.
Pre-chat survey responses as a secondary signal. If a visitor selects “I want to learn about pricing” in a pre-chat survey dropdown, the middleware filters on that field value and routes directly to the HighLevel pipeline, regardless of agent tag. This secondary signal catches high-intent prospects before an agent applies any tag.
Volume-based cost routing. Route broad informational inquiries to AWeber and reserve HighLevel for contacts meeting a minimum engagement threshold. This balances automation cost against lead quality at scale.
Routing Logic Reference Table
| Trigger Condition | Destination | Sequence Type |
|---|---|---|
Tag: newsletter-opt-in | AWeber | Broadcast follow-up |
Tag: behavioral-follow-up | Moosend | Behavioral automation |
Tag: sales-qualified | HighLevel + Moosend | Pipeline + behavioral |
| Survey: “pricing inquiry” | HighLevel | Sales pipeline entry |
| No tag, informational chat | AWeber | General nurture |
Audit this table quarterly as tagging conventions evolve.
Duplicate Contact Prevention and Consent Management
Multi-destination routing creates one risk tagging logic cannot solve: the same email address enrolling in AWeber, Moosend, and HighLevel simultaneously from a single LiveChat session. That triggers three welcome sequences to one inbox, inflates complaint rates across all three sender domains, and creates redundant records that violate GDPR Article 5’s data minimization principle.
Deduplication in Make
Before every add-subscriber action, insert a lookup module for the target platform (AWeber’s “Find Subscriber” or HighLevel’s “Search Contacts”). Set the search key to the email field from the LiveChat payload. If the lookup returns a record ID, route to an update-only action; if it returns empty, proceed to create. Apply this pattern on each route branch independently.
Deduplication in Pabbly Connect
Use a “Find Subscriber” or equivalent step before each add action. Map the returned record ID to a condition step: if non-empty, branch to “Update Subscriber”; if empty, branch to “Add Subscriber.” Pabbly’s condition step handles this with an “exists / does not exist” check on the ID value.
Consent Field Mapping
Include two custom fields on every destination platform: consent_timestamp (UTC time of opt-in) and consent_statement (the exact opt-in text the visitor agreed to). This creates an auditable record in AWeber, Moosend, and HighLevel satisfying GDPR Article 7’s demonstrable consent requirement without relying on external documentation.
Suppression Sync
An unsubscribe on one platform does not automatically suppress the contact on the others. Build a scheduled Make or Pabbly Connect workflow, running nightly or weekly, that pulls each platform’s unsubscribe list and cross-checks it against the other two. Any match triggers a suppression or status-update action on the remaining platforms, closing the compliance gap created by fragmented list management.
Error Handling and Fallback Protocols for Multi-Step Workflows
Even with deduplication and consent mapping in place, multi-step workflows fail at the execution layer. Knowing where breakdowns occur and how to recover without losing contact data separates a production-ready automation from a fragile prototype.
Common failure points to monitor:
- LiveChat webhook not firing: verify your plan includes outbound webhook access before troubleshooting middleware.
- Expired OAuth tokens: AWeber and Moosend tokens expire on a rolling basis and can silently fail weeks after setup.
- API rate limit collisions: Post-event chat surges can exhaust per-minute API limits on AWeber or HighLevel through rapid sequential webhook fires.
- Malformed JSON payloads: Special characters, empty name fields, or abandoned pre-chat surveys can break downstream field parsing.
Make error handling: On every action module, add what Make typically labels a Break directive in the error handler settings. Break stops execution at the failed step and saves the entire run to Make’s incomplete executions queue for manual review and one-click retry. Without Break, Make ignores the error and the contact is silently lost.
Pabbly Connect history log: Every execution is logged with the full request payload and platform response. When a step fails, expand the failed task in execution history, identify whether the cause was an auth error, mapping null, or platform rejection, then replay that execution directly from the log.
Fallback data store: At the start of both your Make scenario and Pabbly Connect workflow, insert a write step that records the raw LiveChat payload to Google Sheets before any platform-specific action runs. If AWeber rejects a contact or HighLevel times out, the raw record is already captured for manual import.
Silent failure monitoring: A 200 status response does not guarantee correct enrollment. Outdated field mapping can submit a contact to the wrong list with no error raised. Schedule a weekly audit of Make’s scenario run history and Pabbly Connect’s task log, checking destination list names against expected routing logic to catch drift before it compounds.
Custom Field Mapping and Rate Limit Considerations
Beyond error handling, field-level precision and API throughput constraints are the next layer of operational risk in this workflow.
Custom Field Mapping by Platform
- AWeber: Custom fields are created inside individual list settings and referenced in middleware by their merge tag name. Field names must match exactly; a mismatch silently drops the value without throwing an error.
- Moosend: Custom fields are defined per mailing list with explicit data type declarations: text, number, or date. Each field must be created in the list before the middleware attempts to write to it.
- HighLevel: Custom contact fields are configured at the account level and are accessible across all pipelines and workflows, so a field created once is universally available without per-list duplication.
Rate Limit Landscape
AWeber, Moosend, and HighLevel each enforce API rate limits; the specific thresholds vary by plan tier and endpoint type. Consult each platform’s current API documentation before estimating throughput capacity for high-volume chat environments.
Mitigation in Make and Pabbly Connect
In Make, insert what Make typically labels a Sleep module between action steps during high-volume scenarios and use scenario scheduling to queue executions sequentially rather than firing all instances at once.
In Pabbly Connect, sequential task execution inherently throttles request rate. For very high chat volumes, add a Delay step between action modules and monitor the task queue dashboard for backlog growth.
Data Type Mismatch Risk
Middleware platforms such as Make and Pabbly Connect may deliver webhook values as strings by default. If your destination platform’s date or number fields reject string-formatted values, apply a data transformation or type-cast step in your middleware before writing to those fields, consult each platform’s field type documentation to confirm requirements.
FAQ: LiveChat to Email Stack Integration
Do I need both Make and Pabbly Connect, or just one? You only need one. Make is better suited for complex conditional branching via its visual canvas. Pabbly Connect is more economical for high-volume chat environments due to flat-rate task pricing. Choose based on workflow complexity and monthly chat volume.
Can I route the same LiveChat contact to all three platforms simultaneously? Yes. Both middleware platforms support parallel and sequential multi-destination routing. However, sending one contact to AWeber, Moosend, and HighLevel at once multiplies suppression list management complexity and demands robust duplicate prevention logic at each destination.
What LiveChat plan is required for webhook access? Check your LiveChat account settings or plan documentation to confirm webhook availability, as this feature may be restricted on entry-level plans. Verify your current plan before building any middleware scenario.
How do I prevent a repeat chatter from enrolling multiple times? Add a subscriber lookup step in your middleware before every add-contact action. If a matching email record exists, route to an update step instead of a create step. Additionally, log the session identifier from the LiveChat payload to a data store and filter out any payload carrying a previously processed ID.
Is this workflow GDPR-compliant? The workflow is a data transfer mechanism; legal basis must be established at the point of collection in LiveChat. Your pre-chat or post-chat survey must include affirmative opt-in language. Store consent timestamps as custom fields in each destination platform for audit purposes.
What happens if a contact unsubscribes from AWeber but remains in HighLevel? Without a suppression sync workflow (covered in the Duplicate Contact Prevention section), the unsubscribe only affects the originating platform.
Can I use this workflow to migrate existing support contacts into email sequences? Yes, but bulk migration requires a different trigger. Export contacts from LiveChat’s reporting section, clean the data for confirmed opt-in status, and use Make or Pabbly Connect’s CSV processing modules to push records to your chosen email platform.
Conclusion: Building a Support-to-Sales Engine That Runs Itself
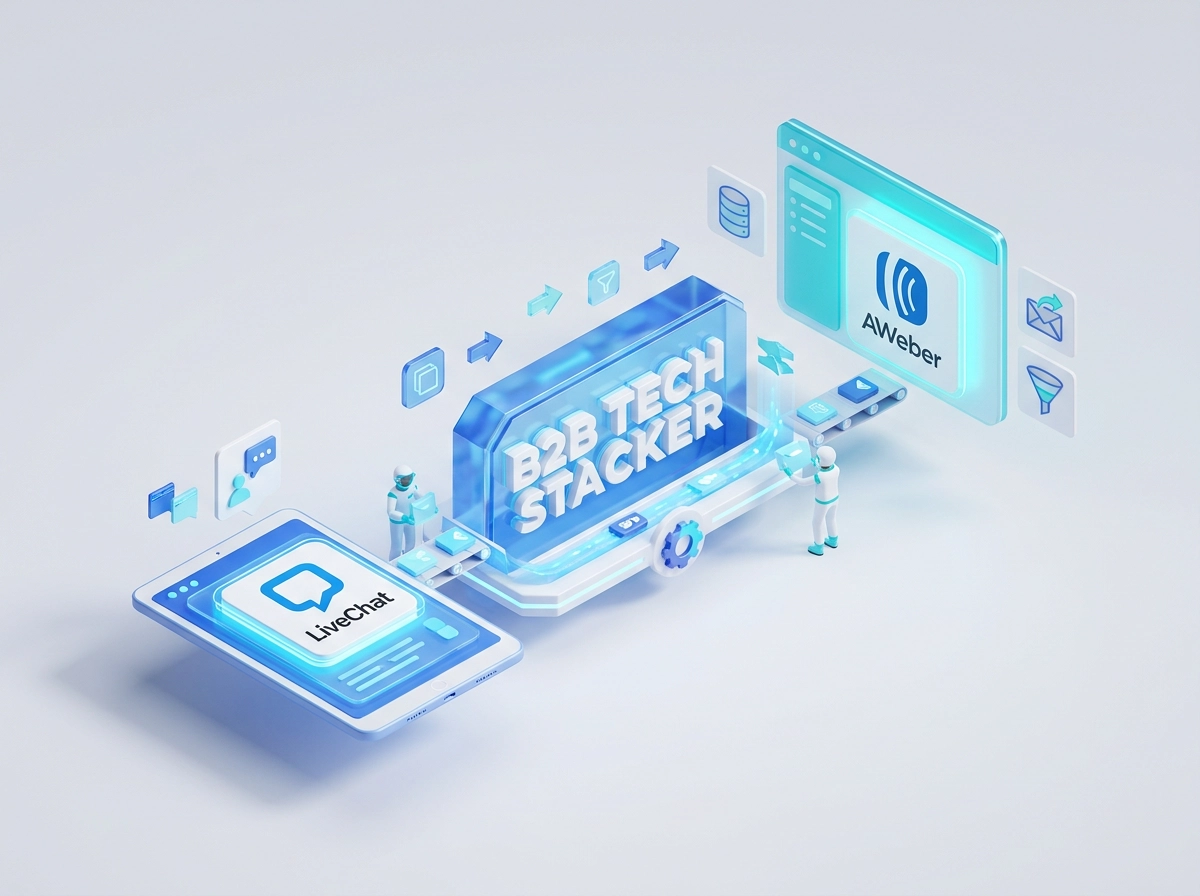
The architecture covered in this blueprint follows a single, repeatable logic: LiveChat captures the prospect signal at the moment of conversation, Make or Pabbly Connect routes and transforms that data, and AWeber, Moosend, or HighLevel executes the nurturing sequence automatically, with no manual handoff required.
Three implementation decisions determine whether this workflow delivers durable results or accumulates technical debt:
- Configure LiveChat webhooks and agent tagging conventions first. Middleware built on inconsistent tagging produces inconsistent routing.
- Build deduplication and consent field mapping into the initial deployment. Retrofitting both is significantly more disruptive than including them from day one.
- Select your destination platform based on lead intent level. Routing every contact to the most convenient platform wastes the segmentation capability the architecture provides.
The compounding value here is measurable. Every support conversation becomes a documented, routable lead event. Over time, that produces a trackable support-to-pipeline conversion rate, a metric that directly justifies the automation investment to stakeholders.
Start with one route: LiveChat to a single platform via one middleware. Prove the data flow, validate the field mapping, and confirm deliverability before adding parallel destinations. Complexity added before the foundation is stable creates failure points that are difficult to isolate.